Boca Bearings Installation for : Front, Center, and Rear Differential Bearings in Z-Car ZMXT-8 Pro Truggy
by William Goodwin
The first step to any good installation is to make sure that everything is clean and free of dirt. I personally like to remove all un-necessary items like the motor, pipe, fuel tank, and radio tray. Most of us remove these items during a normal post event cleaning.

Now that we are nice and clean and ready to open it up we will start with the rear differential. First thing is loosen the sway bar at the adjustment point, and remove the top shock mounting nuts, then remove the 2 outer bolts that fasten the upper link.

Next thing is turn over the truck so we can get at the bolts underneath. Take out the 4 that hold the diff case to the chassis, and the 2 that attach the rear brace to the chassis.

Next turn the truck back over and remove the 2 long screws that go through the rear toe plate into the rear diff case.

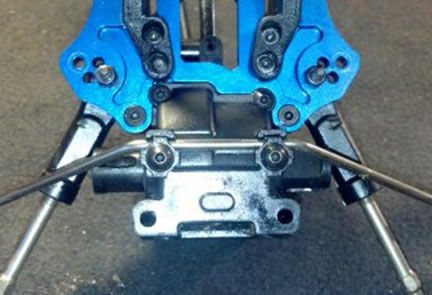
Now you should be able to remove the rear unit from the chassis lifting slightly in the front to slide forward and away from the rear toe plate the up and out to the back to remove the sway bar ends and rear shaft from the center. What you should have now is this:
Next thing we will do is remove the 2 small srews at the very top of the diff case and remove the rear cover.

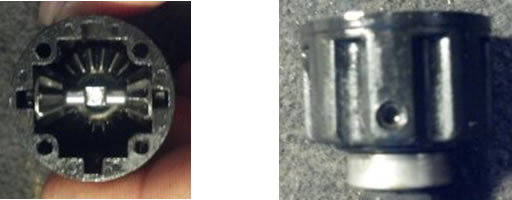
Now we can go ahead and remove the differential unit from the case. Set this aside and we will change the pinion bearings first then change the outer diff bearings. First locate the set screw in the rear driveshaft and remove it.

Now we can slide the driveshaft out of the brake disc and away from the pinion shaft, then remove the disc. Now you should be able to just slide the pinion gear out of the bearings and remove them from the case. Make sure and clean everything thoroughly before inserting the new bearings into the case and then installing the pinion gear.

Now is a good time to re-attach the rear driveshaft making sure to locate the brake disc first inserting the driveshaft through and onto the pinion shaft leaving zero end play between the pinion and the bearings. Remember to use some BLUE loktite on the set screw.
Now we will move on to the differential itself. First remove the 4 screws that attach the ring gear to the diff case.

Then seperate the gear and remove the small crown gear and drive pin from the output shaft.


Now you can remove the shaft and the bearing from the ring gear. After a thorough cleaning install new bearing and insert the diff output shaft, drive pin and crown gear.
Next remove the 2 shafts with the spider gears and the lower crown gear. Remember to remove the small set screw from the side of the case as you can remove the lower drive pin through the hole, and now you can remove the lower diff output shaft and bearing.
Install new bearing and re-assemble diff. Remember to re-install the small set screw with some BLUE loktite. Now you can fill your diff with new fluid and re-assemble.

Always remember to replace all shims and make sure the gear mesh is correct before installing the unit back in the car. Make sure and re-assemble all bolts with some BLUE loktite and tighten. Now you can put the whole assembly back together and install it in the chassis. This completes the installation of the rear pinion bearings, and the outer differential bearings.
The center differential is very simple. To remove the center diff from the car turn the car upside down and remove the 4 screws that attach the center diff to the motor plate.

Now that you have the center diff out of the car you can remove the 4 screws that fix the top plate on and seperate the diff from it's bulkheads. Follow the same procedure for disassembly and assembly as in the rear diff.

Re-assemble and install in chassis remembering to use BLUE loktite on all screws.
Front differential is very similar to the rear except for a few things. First you must disconnect your steering links from the outer hubs, then remove the 2 small screws in the diff case at the top plate. Turn the vehicle over and remove 4 screws that hold the diff case on and 1 small screw that fixes the front bumper. With a little finesse the whole front end less the steering rack will come right out.

Follow the same procedure as the rear end in reference to the pinion bearings and the diff bearings. Clean everything and re-assemble. Remember to use BLUE loktite on all your screws, and re-install in chassis paying close attention to the upper arm pins and the front driveshaft as you slide it in. Your center driveline is now completed. Enjoy your new Boca Bearings.