Robotic Arm: Development stage
Robotic Arm: Development stage
Aug 12, 2022
Nathan Fournier
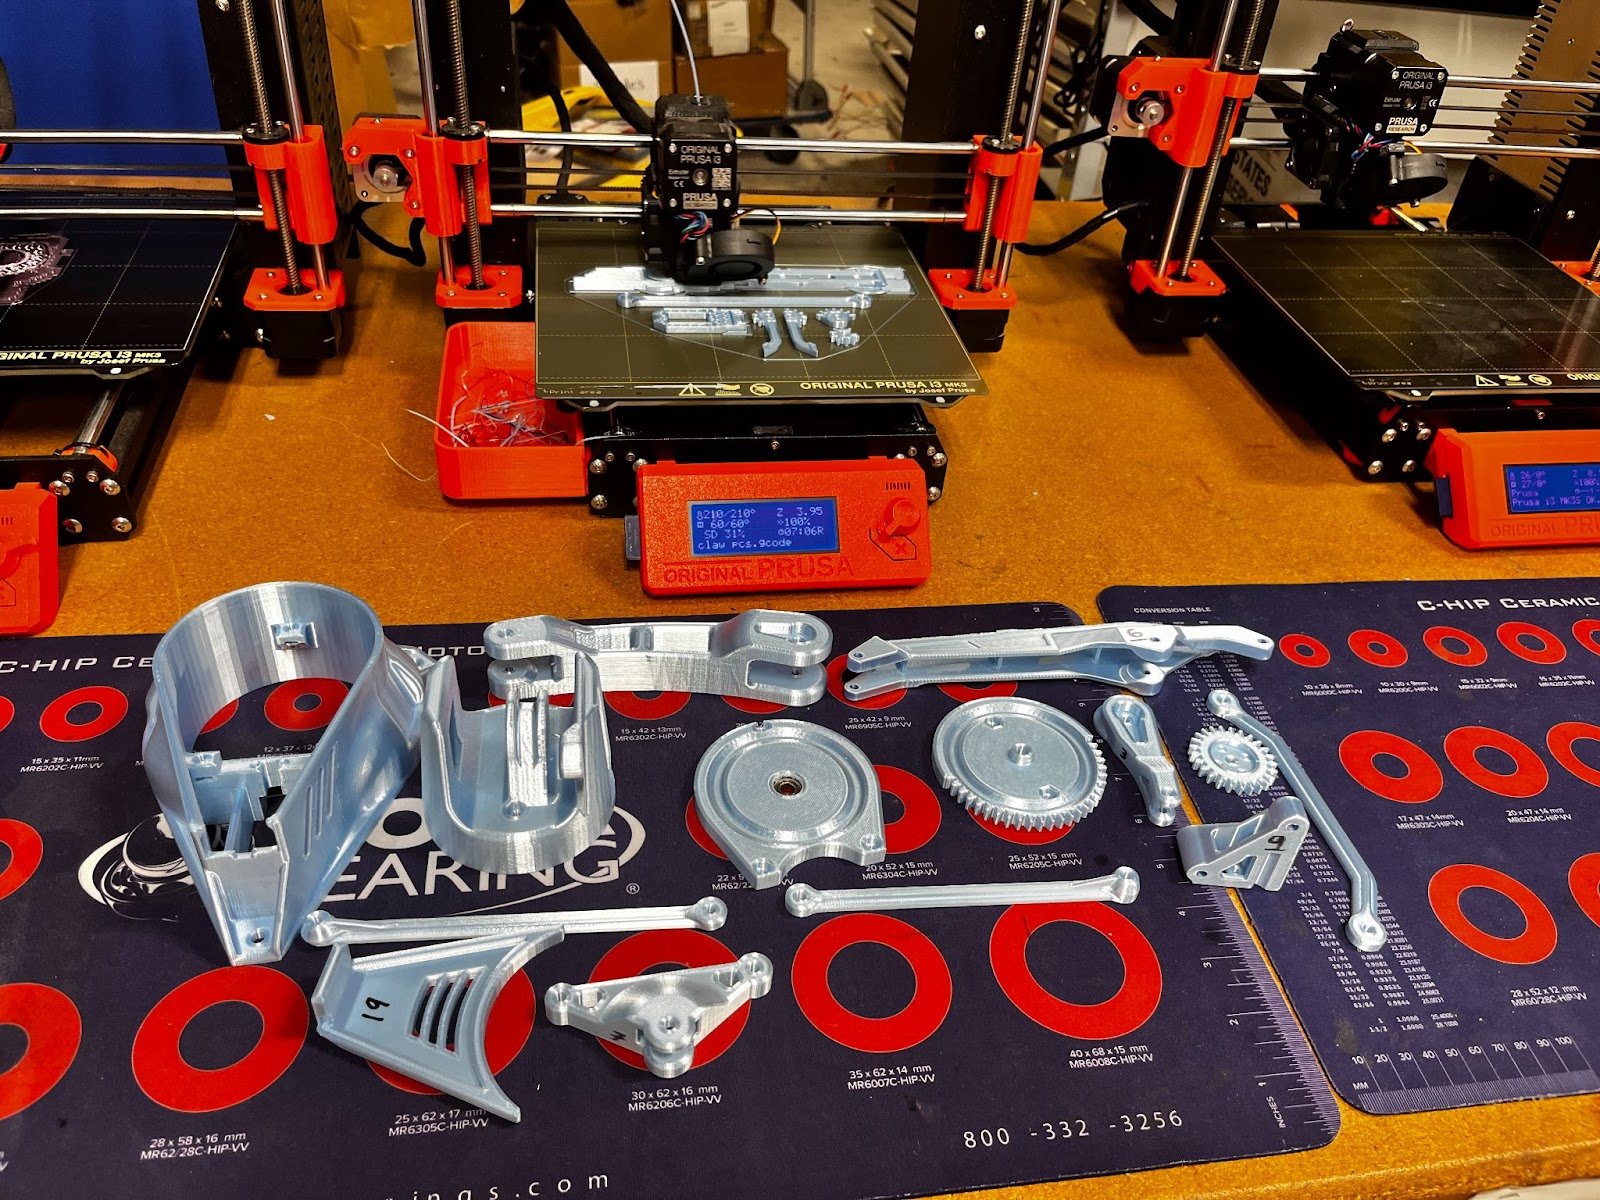
As my Boca Bearings comparison tower project is now complete, I had to look for what I could do next. After scouring Thingiverse through many questionable things to 3D print, including a T-rex shower curtain holder, I found a robotic arm that had very straightforward instructions and many other users creating their own version. This model can be found through the link on Thingiverse. Seeing how refined this model is compared to the original arm that the creator had designed, I decided to print this arm as it can carry a higher payload and utilizes bearings and bearing balls. I used a 606zz bearing (BocaBearings/606zz) and 30 of the 25mm diameter steel balls (BocaBearings/25mmBalls), both products can be found on the Boca Bearings website.
To start this project, I printed parts of the arm using Hatchbox PLA plastic with print settings of 4 vertical shells and a 20% infill. Despite only being the first print, I am hoping that there won't be multiple parts having to be reprinted to save time and materials. So far, the pieces have printed out well except for slight issues on the top arm and a support arm which I have already started to reprint.
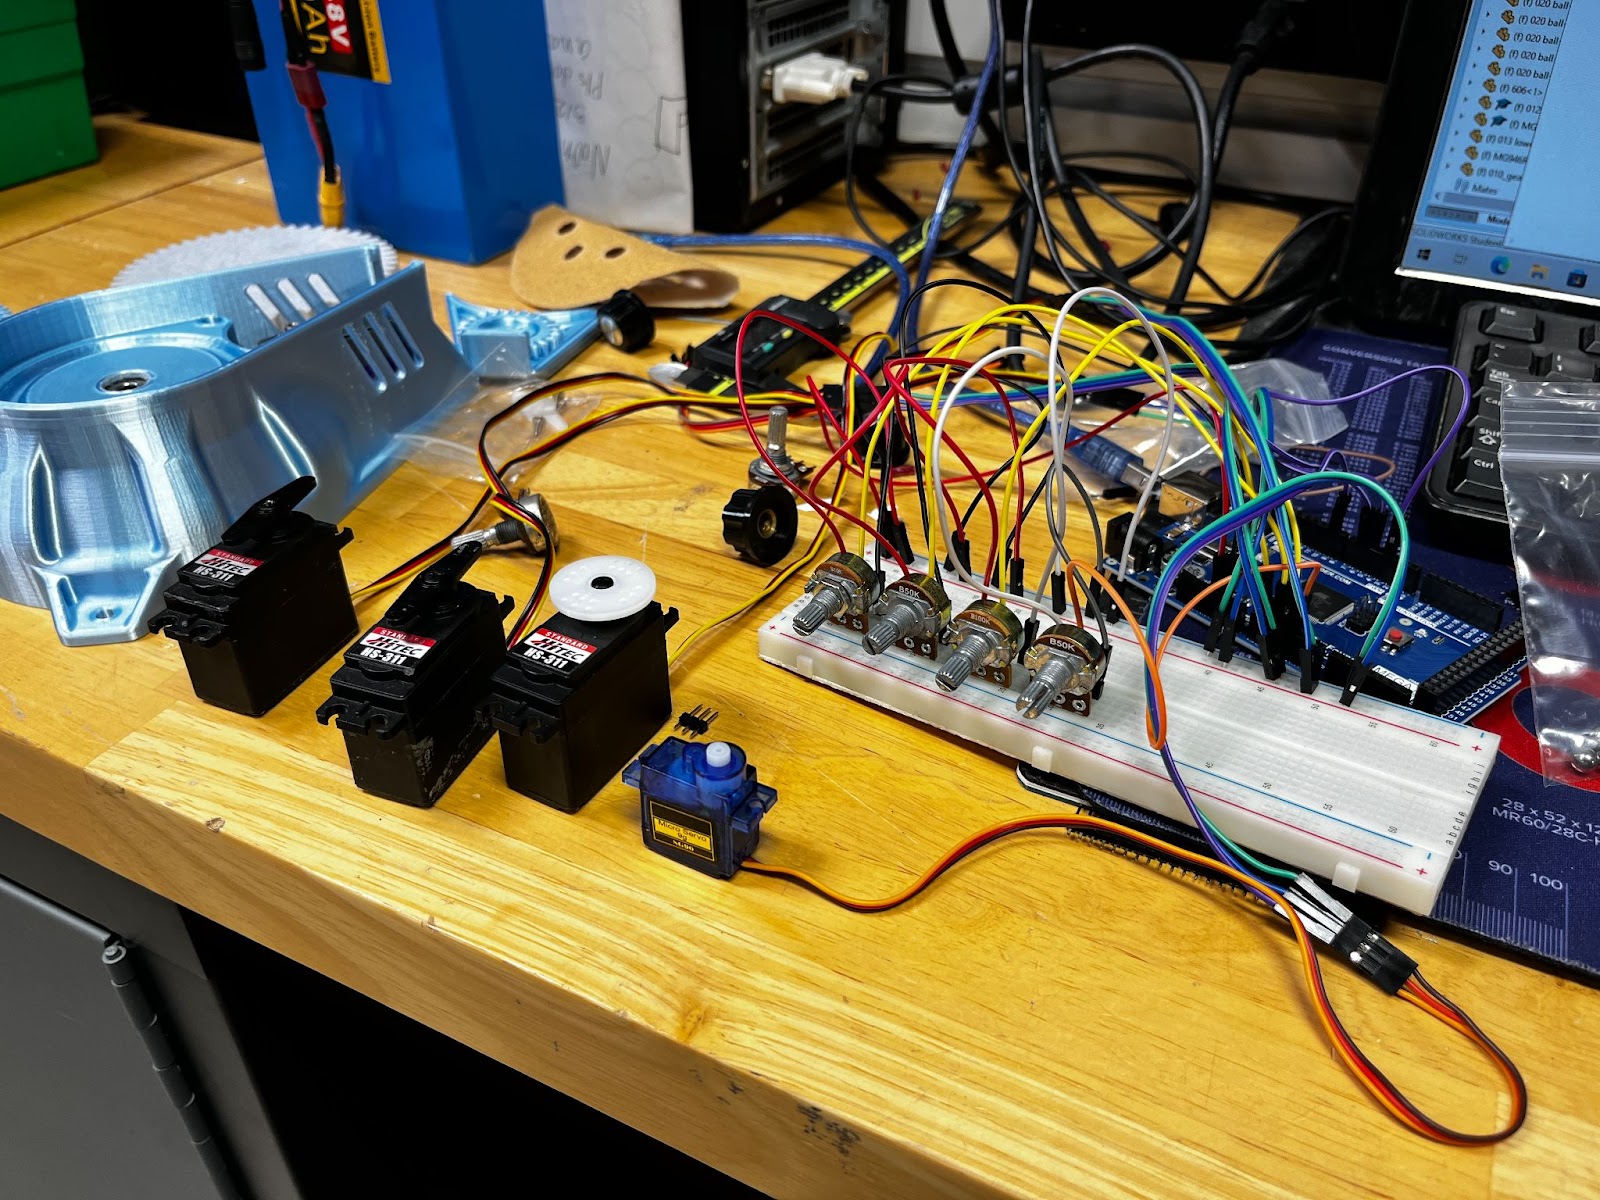
To control the arm, it is possible to use a servo motor controller board and computer program to manually move the arm or program a certain task that it can repeat over and over. However, I decided that I want the arm to be controlled through individual potentiometers for each servo motor. As we are bringing this project to Maker Fair in Orlando, I find it would be more interesting if it was interactive and could be used by those visiting the Boca Bearings Booth. To house these potentiometers, I have been working on a rough sketch of a control housing that could contain the Arduino, servo controller, and potentiometers.
I have already started working out the electronics as that usually is an obstacle for me. I noticed that as I wired the four servo motors and four potentiometers to the breadboard and Arduino, the servos would twitch slightly back and forth despite not being touched. I did some research and found that this could be caused by a lack of sufficient power which can hopefully be fixed when I use a higher voltage going to the servo controller board. Along with powering the servos, I plan to use a voltage converter to lower the voltage to 5 volts going to the Arduino so the project only requires one outlet to be powered.